Post by Archer on Oct 7, 2009 17:50:11 GMT -6
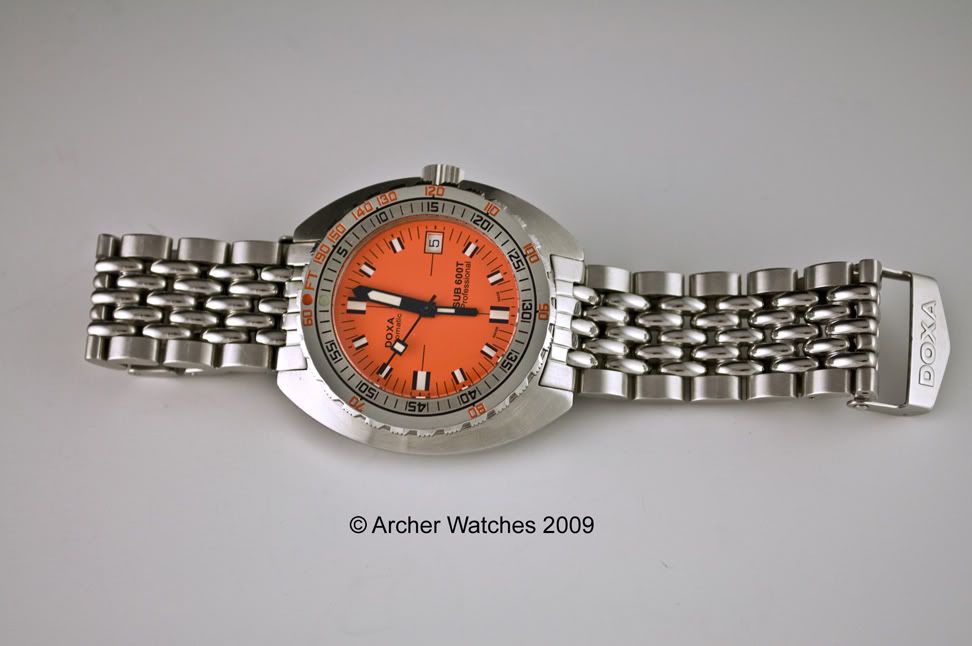
It's been a while since I posted any repair threads, so I thought you might be interested in seeing the servicing of a modern dive watch. I received this Doxa Sub 600T with the owner stating that the watch would only run for short periods of time.
So the bench is cleared and ready to start this job:

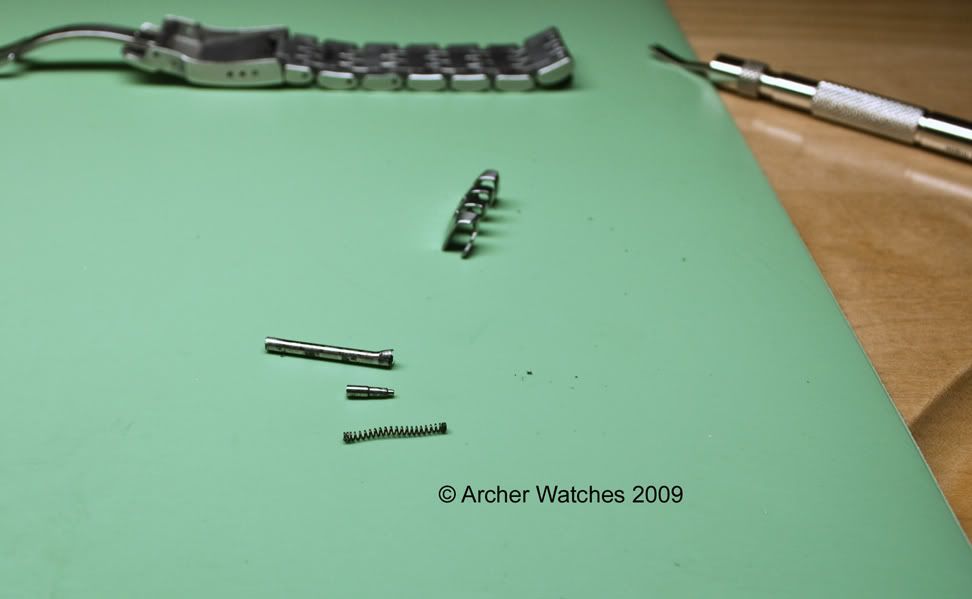
The owner had also complained that the bracelet end link didn't fit tight to the case on one side, and when I removed the bracelet I found out why. The spring bar just fell apart on my bench, so very fortunate this didn't happen while the watch was being worn:
Opening the case, the ETA 2824-2 is seen:

I was a bit surprised to see the base version of this movement in this watch. So here the movement is out and I'm preparing to remove the dial and hands:

Here the hands and dial have been removed:

Before I continue with the dial side, I remove the auto-winding bridge:

Now I start removing the calendar:

Here the winding/setting mechanism has been removed:

Now to the top plate, and the ratchet wheel has been removed. I wanted to point this out as here there is a boss that is part of the barrel bridge that the ratchet wheel rides on. You can see the black material where the green arrows are, and this is material that has worn off the boss at the spot indicated by the red arrow. This movement can wear a great deal here so one reason why regular service is a good idea, even if the watch appears to run well:

Carrying on with disassembly:


Here the base plate has been stripped of all parts:

Now to disassemble the auto-winding system:

And everything is apart now and placed by function in the storage trays:

But they don't stay there long as up next is the cleaning machine:


Now back to the bench and ready for assembly:

In an automatic watch, the mainspring that powers the movement is not fixed at both ends like in a manual wind watch. The outer end of the spring is allowed to slide around in the inside of the barrel, and this is what many people on watch forums refer to as the "clutch" that prevents overwinding. In many modern barrels there are grooves on the barrel wall that help hold back the outer coil of the spring, because the spring needs to be wound to have the power needed to run the movement. But these small grooves aren't enough, and part of servicing an automatic is to add braking grease to the barrel wall. The grease creates drag and allows the spring to be wound to full tension to generate the proper power reserve. Too little grease and the spring will slip too soon causing the watch to run short of the stated power reserve. Too much grease and the balance amplitude will be too high, and the watch will knock and run erratically. Here I am applying the braking grease to this barrel:

Here the barrel is greased and ready to accept the mainspring (a new one of course):

Here the new spring has been installed:

And the barrel is back together as a unit and set aside ready for the movement at a later time:

The next thing I do is lubricate and install the balance jewels, and install the balance to check the hairspring. Here you can see the spring as it goes through the regulating pins, and it's too far to the right and touching the inner pin, where it should be centered between the pins:

Here the spring has been adjusted, with attention being paid to the overall centering/spacing of coils from above. This required rotating the hairspring stud and also manually manipulating the spring:

Now the balance is removed and the assembly can begin, so here the barrel and barrel bridge is in place:

More reassembly:


Now we are at the point where the escapement needs to be lubricated, and the pallet stone I will oil is shown in the small blue circle:

After that is complete, I place the balance c ock and the balance fires right up:

Now I do a little work on the auto-winding. First I check the bearing in the rotor, and I do a quick test to see that the rotor runs freely. I start by placing the rotor on a piece of peg wood, and then use my tweezers to rotate the rotor 45 degrees from it's hanging position:

Next I let the rotor swing freely, and using a watch just out of the photo I time how long it swings. The rotor should swing for at least 1 minute, and this one goes a few seconds past, so it's good. I then can oil the bearing and repeat the test, making sure that the time doesn't change more than a few seconds:

I then check and oil the reversing wheels, and assemble the bridge:


So now to assemble the calendar:


All done, and the checks look good:

Now it's time to put this back together:

The dial spacer and dial are first:


Then the hands are pressed on, paying attention to the date change so that it's within the tolerances:

The stem is lubricated:

Now the watch is cased:

And I install the auto-winding bridge:

And onto the timing machine for initial regulation:

Once that's done, time to close it up and do some extended timing and power reserve tests:


So to check the rate I wind the watch by hand, let it sit 24 hours in the crown left position, and note the gain or loss. I then put the watch on a final test winder, and let it turn for 24 hours on the winder, then check the gain or loss. I then let the watch sit for 24 hours dial up, and check the gain or loss. Finally I let the watch run down (since it hasn't been wound except by the winder) and see that the power reserve is within tolerances. The power reserve was fine and the timing worked out well - the average of the crown left, winder, and dial up tests was +0.3 seconds per day. The watch is shown here on the final test winder:

The next step is checking the water resistance of this watch. For this I use 2 machines. The first is the Witschi Proofmaster S dry pressure testing machine. This machine is set to the dive watch program, which first subjects the watch to a -0.7 Bar vacuum, and then a +10 Bar pressure. The watch is constantly measured to detect deflection in the case, and through those measurements determines if the watch is water resistant. Here the watch is mounted in the chamber:

And here the test is complete, and I have magnified the results screen and inset it into the photo:

But we aren't done yet. This watch is rated to 600 m or 60 Bar, so a test at 10 Bar won't really tell us if it's performing as it should. For that we use a wet testing machine. There is some risk with this second test, as the process basically involves trying to force water into the case at high pressure. I use a Lititz Watch Co. Diver 125 machine:


The watch is placed in the holder, and then into the test chamber. The test chamber is filled with distilled water to the very top:

The lid is placed trying not to allow any bubbles inside the chamber:

The watch is tested at a higher level than it's rated capacity, so for a 60 Bar watch, the machine is set to 70 Bar, or just over 1,000 pounds per square inch:

The watch is left at this pressure for 2 hours, then I come back and lower the pressure:

The watch has stopped, but that was because it ran out of power reserve

It's removed from the chamber, dried off, and placed on a heating station that heats the watch to 47 degrees C:

30 minutes later, I return and place a few drops of room temperature water on the watch crystal:

I wait a couple of minutes and then wipe the water off. If the watch has leaked the inside of the crystal will have fogged, but this one is clean:

Here is an example of a watch that didn't pass the test....not good:
Here is the finished watch on a short trial run on my wrist:

So I hope you enoyed this look at servicing a modern dive watch.
Thanks for looking.
Cheers, Al
So the bench is cleared and ready to start this job:
The owner had also complained that the bracelet end link didn't fit tight to the case on one side, and when I removed the bracelet I found out why. The spring bar just fell apart on my bench, so very fortunate this didn't happen while the watch was being worn:
Opening the case, the ETA 2824-2 is seen:
I was a bit surprised to see the base version of this movement in this watch. So here the movement is out and I'm preparing to remove the dial and hands:
Here the hands and dial have been removed:
Before I continue with the dial side, I remove the auto-winding bridge:
Now I start removing the calendar:
Here the winding/setting mechanism has been removed:
Now to the top plate, and the ratchet wheel has been removed. I wanted to point this out as here there is a boss that is part of the barrel bridge that the ratchet wheel rides on. You can see the black material where the green arrows are, and this is material that has worn off the boss at the spot indicated by the red arrow. This movement can wear a great deal here so one reason why regular service is a good idea, even if the watch appears to run well:
Carrying on with disassembly:
Here the base plate has been stripped of all parts:
Now to disassemble the auto-winding system:
And everything is apart now and placed by function in the storage trays:
But they don't stay there long as up next is the cleaning machine:
Now back to the bench and ready for assembly:
In an automatic watch, the mainspring that powers the movement is not fixed at both ends like in a manual wind watch. The outer end of the spring is allowed to slide around in the inside of the barrel, and this is what many people on watch forums refer to as the "clutch" that prevents overwinding. In many modern barrels there are grooves on the barrel wall that help hold back the outer coil of the spring, because the spring needs to be wound to have the power needed to run the movement. But these small grooves aren't enough, and part of servicing an automatic is to add braking grease to the barrel wall. The grease creates drag and allows the spring to be wound to full tension to generate the proper power reserve. Too little grease and the spring will slip too soon causing the watch to run short of the stated power reserve. Too much grease and the balance amplitude will be too high, and the watch will knock and run erratically. Here I am applying the braking grease to this barrel:
Here the barrel is greased and ready to accept the mainspring (a new one of course):
Here the new spring has been installed:
And the barrel is back together as a unit and set aside ready for the movement at a later time:
The next thing I do is lubricate and install the balance jewels, and install the balance to check the hairspring. Here you can see the spring as it goes through the regulating pins, and it's too far to the right and touching the inner pin, where it should be centered between the pins:
Here the spring has been adjusted, with attention being paid to the overall centering/spacing of coils from above. This required rotating the hairspring stud and also manually manipulating the spring:
Now the balance is removed and the assembly can begin, so here the barrel and barrel bridge is in place:
More reassembly:
Now we are at the point where the escapement needs to be lubricated, and the pallet stone I will oil is shown in the small blue circle:
After that is complete, I place the balance c ock and the balance fires right up:
Now I do a little work on the auto-winding. First I check the bearing in the rotor, and I do a quick test to see that the rotor runs freely. I start by placing the rotor on a piece of peg wood, and then use my tweezers to rotate the rotor 45 degrees from it's hanging position:
Next I let the rotor swing freely, and using a watch just out of the photo I time how long it swings. The rotor should swing for at least 1 minute, and this one goes a few seconds past, so it's good. I then can oil the bearing and repeat the test, making sure that the time doesn't change more than a few seconds:
I then check and oil the reversing wheels, and assemble the bridge:
So now to assemble the calendar:
All done, and the checks look good:
Now it's time to put this back together:
The dial spacer and dial are first:
Then the hands are pressed on, paying attention to the date change so that it's within the tolerances:
The stem is lubricated:
Now the watch is cased:
And I install the auto-winding bridge:
And onto the timing machine for initial regulation:
Once that's done, time to close it up and do some extended timing and power reserve tests:
So to check the rate I wind the watch by hand, let it sit 24 hours in the crown left position, and note the gain or loss. I then put the watch on a final test winder, and let it turn for 24 hours on the winder, then check the gain or loss. I then let the watch sit for 24 hours dial up, and check the gain or loss. Finally I let the watch run down (since it hasn't been wound except by the winder) and see that the power reserve is within tolerances. The power reserve was fine and the timing worked out well - the average of the crown left, winder, and dial up tests was +0.3 seconds per day. The watch is shown here on the final test winder:
The next step is checking the water resistance of this watch. For this I use 2 machines. The first is the Witschi Proofmaster S dry pressure testing machine. This machine is set to the dive watch program, which first subjects the watch to a -0.7 Bar vacuum, and then a +10 Bar pressure. The watch is constantly measured to detect deflection in the case, and through those measurements determines if the watch is water resistant. Here the watch is mounted in the chamber:
And here the test is complete, and I have magnified the results screen and inset it into the photo:
But we aren't done yet. This watch is rated to 600 m or 60 Bar, so a test at 10 Bar won't really tell us if it's performing as it should. For that we use a wet testing machine. There is some risk with this second test, as the process basically involves trying to force water into the case at high pressure. I use a Lititz Watch Co. Diver 125 machine:
The watch is placed in the holder, and then into the test chamber. The test chamber is filled with distilled water to the very top:
The lid is placed trying not to allow any bubbles inside the chamber:
The watch is tested at a higher level than it's rated capacity, so for a 60 Bar watch, the machine is set to 70 Bar, or just over 1,000 pounds per square inch:
The watch is left at this pressure for 2 hours, then I come back and lower the pressure:
The watch has stopped, but that was because it ran out of power reserve

It's removed from the chamber, dried off, and placed on a heating station that heats the watch to 47 degrees C:
30 minutes later, I return and place a few drops of room temperature water on the watch crystal:
I wait a couple of minutes and then wipe the water off. If the watch has leaked the inside of the crystal will have fogged, but this one is clean:
Here is an example of a watch that didn't pass the test....not good:
Here is the finished watch on a short trial run on my wrist:
So I hope you enoyed this look at servicing a modern dive watch.
Thanks for looking.
Cheers, Al